Add CSS codes into your blogger blog easily

/ Tuesday, February 28, 2012 /
add css code easily in blogger blog
How to Add CSS codes to your blogger Blog easily.
Sometimes you may want to add CSS codes to your blog for styling blog elements or blog widgets,Many of us adding CSS code by going to Edit HTML and add codes before ]]></b:skin> and save template, Using this method by mistake  if any of the content in it deleted ,it my goes to your Template Crash.So there is a secure and alternate way to add CSS code as follows   .Here is a simple way to add CSS codes.


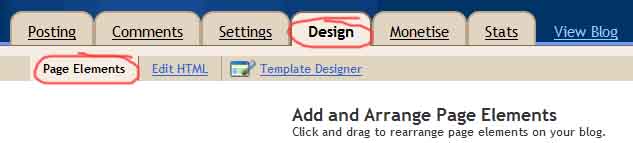
  •  Go to Design-> Template Designer (as shown in the figure)
add css codes in blogger easy way
Update [01/06/2012] : Select Template -> Customise   in New Upgraded Blogger Interface
  • Template Designer will open
  • Select Advanced -> Add CSS
  •  Place the CSS codes in the Text area.
  • Then you can see preview by clicking preview.
  • Save by click on Apply to Blog

Link Nudge using css3 and jquery blogger widget

/ Monday, February 27, 2012 /
Link nudge with css3 and jquery to any links
This is a Simple Link nudge Effect tutorial.You can add this to links in your Blog.While Mouse over the link a simple animation works.This can be done through two methods.You can use any one of these.
  1. Through CSS3 .
  2. With jQuery Effect.
Live Demo of Link nudge is following


Live Demo of Link nudge is following

Link Nudge Using CSS3

  • Go to Blogger Account
  • Design -> Edit HTML
  • Find ]]></b:skin>  and copy the below code BEFORE it
.noopln {
-moz-transition: all 0.1s ease-in 0s ;
-webkit-transition: all 0.1s ease-in 0s ;
-o-transition: all 0.1s ease-in 0s ;
}

.noopln:hover {
margin-left: 12px;
}
  • Save it.
  • If you want link nudge effect to a link add class noopln to each link
Eg: <a class="noopln" href="http://blogger.com">Blogger</a>
If you want this Link Nudge Effect to labels follow the steps below
  • Go to Design->Edit HTML
  • Find ]]></b:skin> and copy the following code BEFORE it

.noopln,Label li,#Label1 ul li a,.Label li a {
-moz-transition: all 0.2s ease-in 0s ;
-webkit-transition: all 0.2s ease-in 0s ;
-o-transition: all 0.2s ease-in 0s ;
}

.noopln:hover,Label li:hover,#Label1 ul li a:hover,.Label li a:hover {
margin-left: 14px;
}

  • That's all the Link Nudge with CSS3

Link Nudge using jQuery

Step 1: Add jQuery plugin (if your blog have a jquery plugin,ignore this step)
  • Go to Template->Edit HTML
  • Copy and paste the below code <head>
<script src='http://ajax.googleapis.com/ajax/libs/jquery/1.7.1/jquery.min.js' type='text/javascript'/>
 Step 2 :Adding jQuery script for Link Nudge
  • Sign In to your Blogger Account
  • Go to Design->Edit HTML
  • Find </head> and copy below code snippet BEFORE it
<!--Netoops Link Nudge Start-->
<script type='text/javascript'>
var speed = 300; // Speed Of Animation
$(document).ready(function() {
$(&#39;a.noopln,#Label1 ul li a,.Label li&#39;).hover(function() {
$(this).animate({paddingLeft: &#39;13px&#39;}, speed);
}, function() {$(this).animate({paddingLeft: 0}, speed);
});
}); </script><a href='http://netoopsblog.blogspot.com'><img src='https://blogger.googleusercontent.com/img/b/R29vZ2xl/AVvXsEiQ0e5ZEfJK-AN6H-zHMavjeM7DtHVsPbsqJllkq3WO5WaANiayTASgDbVakiDUDOH5PKwna8J7ugcvGuMwLPpMXJooV_yybolDB_vWAJ_Ei8pIL6IJoRu1OcZx-FFab6tIEH4HJCHcc8E/s1600/1x1juice.png'/></a><!--Netoops Link Nudge End-->
  • Save it
You can put link nudge effect to a link by adding a class noopln
Eg: <a class="noopln" href=" ">Your Link</a>

If your link already have a class then add this class after a space.

Eg: <a class="anotherclass noopln" href=" ">Your Link</a>
The above jQuery code snippet is also work with your Labels,If you don't need Link Nudge effect to your labels then delete the red blinking highlighted code in it.
And Save the Template linknudge css3 and jquery
Its almost finished,If you enjoyed this article share and like us.
Check out more Blogger Tips and Spice your blog tips

Facebook jQuery POP OUT likebox widget generator

/ Saturday, February 25, 2012 /
facebook likebox widget
I had developed a Facebook Static popout jquery effect Like box generator for you.This Widget Generator let's you easily generaate your favorite Facebook style Widget and also easily add to your Blogger Blog.In my previous Article (How to Add a Static Facebook jQuery Pop out Widget) I told you about Static Facebook POP OUT Widget installation manually.Use this Widget generator and Enjoy..!


Step 1: Add jQuery plugin (if your blog have a jquery plugin,ignore this step)
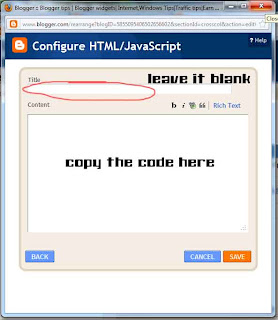
  • Go to Design->Edit HTML[Template->Edit HTML in new blogger interface]
  • Copy below code inside <head>
<script src='http://ajax.googleapis.com/ajax/libs/jquery/1.7.1/jquery.min.js' type='text/javascript'/>
  • Go to Design-> Page Elements
  • Click add gadget and select HTML/javascript
  • Copy and paste the generated code inside it and save it.


This is my first widget generator,also expect more other awesome widget generators from us.If you enjoyed this widget Generator please please share n like us..

Dynamic Views Button with jquery Effect for Blogger Blog

/ Monday, February 20, 2012 /
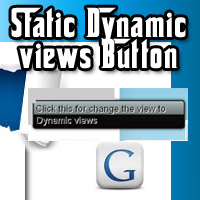
Here is a Simple Tip to Set a Button for Changing the Blog View to Dynamic Views.I added Smooth jquery Hover Effect to Button.You can set any template to your Blogger Blog.If you add this Button to your Blog.It lets your Blog visitors to View Blog in Dynamic Views when they Click this Button.


Add Dynamic Views Button to Blog

Make sure you had Backed up your Template before editing Template.(How to Backup Template)

  • Go to Design -> Edit HTML
Step 1.Add jQuery Plugin( If your Blog already have a jQuery plugin ignore this Step ),
    • Go to Design->Edit HTML
    • Copy and Paste Below code inside <head> section
      <script src="https://ajax.googleapis.com/ajax/libs/jquery/1.7.1/jquery.min.js"></script>
    Step 2: Add Dynamic view button,
    •  Go to Design-> Page Elements
    • Click on Add Gadget ,Select HTML/Javascript from it
    • Leave Title as blank, Copy the below code inside content section.

      <div class="noopdynamic">
      Click this for change the view to Dynamic views</div>
      <a href="/view">
      <img class="noopdynamicimg" src="https://blogger.googleusercontent.com/img/b/R29vZ2xl/AVvXsEiCAjYV1MdgUBlzRoTLwra3jYqY6n1wvmm887gdRkwuEaPMjUDvySPOKmt6cbPKAYlm1c0-c5wOUKBKgZtZeLXw75-EgwTD2ucvfRzrz44YI8ZG9EsIoB_opA58ieTPTY4e-Nr5PYMZHws/s1600/google+dynamic+views.jpg" /></a>
          <style type="text/css">
          .noopdynamicimg{bottom: 2%;
              position: fixed;
              right: 1%;}
              .noopdynamic {background: -moz-linear-gradient(top, #aebcbf 0%, #6e7774 50%, #0a0e0a 51%, #0a0809 100%); background: -webkit-linear-gradient(top, #aebcbf 0%, #6e7774 50%, #0a0e0a 51%, #0a0809 100%);
              background-color:#ABABAB;
              border: 2px solid;
              border-radius: 6px 6px 6px 6px;
              bottom: 13%;
              padding: 4px;z-index:999;
              position: fixed;
              right: 5%;
              font:18px Arial;
              text-shadow: 1px 1px 0 #FFFFFF;
              width: 21%;
              box-shadow:0 0 5px;
          }

          </style>

      <script type="text/javascript">
      $(function(){
          $(".noopdynamic").hide(0);
      $(".noopdynamicimg").hover(function(){
          $(".noopdynamic").show("slow");
      },function(){$(".noopdynamic").hide("medium");
      });});
      </script>
      • Then Save it.
      • That's all,you are done..
      I hope you enjoyed this article,if so please share n like us.

      Stylish Static animated Flash Clock for Blogger

      / Sunday, February 19, 2012 /
      stylish clock blogger
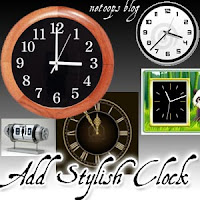
      Here I am saying about How to Add a Stylish Flash Animated Clock to your Blogger Blog.Here is a huge collection of Clock widgets for your taste.Follow the Simple Steps below to make your Blog Stylish,Cool, and Smart looking Blog.


      • First of all SignIn to your Blogger Account 
      • Select Design->Page Elements
      • Click on Add Gadget
      • Select HTML/javascript from it,then copy the code of clock you want.
       

        Step 1: If you want a NON Static Clock Widget,then Just copy and paste the code to HTML/javascript content.

        If you want a cool static clock,then first do the step above and Click HERE

        Add Stylish Flash Clock 1


        • If you want to add this Clock,then Copy  and paste the below code
        <div class="noop-clock"><center><embed height="140" src="http://www.hitarek.com/clock/clock24-6.swf?TimeZone=IST&amp;Place=&amp;" type="application/x-shockwave-flash" width="210"></embed></center><center><a style="font-size: 3mm" target="_blank" href="http://www.hitarek.com">Free Clock</a></center></div>

        Add Stylish Flash Clock 2


        • If you want to add this Clock,then Copy  and paste the below code
        <div class="noop-clock"><center><!-- hitarek.com --><embed width="210" src="http://www.hitarek.com/clock/clock24-2.swf?TimeZone=IST&Place=&" height="140"  type="application/x-shockwave-flash"></embed></center><center><a style="font-size: 3mm" target="_blank" href="http://www.hitarek.com">Free Clock</a></center></div>

        Add Stylish Flash Clock 3


        • If you want to add this Clock,then Copy  and paste the below code
        <div class="noop-clock"><center><!-- hitarek.com --><embed width="120" src="http://www.hitarek.com/clock/clock5-1.swf?TimeZone=IST&Place=&" height="230" wmode="transparent" type="application/x-shockwave-flash"></embed></center><center><a style="font-size: 3mm" target="_blank" href="http://www.hitarek.com">Free Clock</a></center></div>

        Add Stylish Flash Clock4


        • If you want to add this Clock,then Copy  and paste the below code
        <div class="noop-clock"><center><embed height="230" src="http://www.hitarek.com/clock/clock5-2.swf?TimeZone=IST&amp;Place=&amp;" type="application/x-shockwave-flash" width="120" wmode="transparent"></embed></center><center><a style="font-size: 3mm" target="_blank" href="http://www.hitarek.com">Free Clock</a></center></div>

        Add Stylish Flash Clock4


        • If you want to add this Clock,then Copy  and paste the below code
        <div class="noop-clock">
        <center><iframe allowtransparency="true" frameborder="0" height="148" hspace="0" marginheight="0" marginwidth="0" scrolling="no" src="http://www.hitarek.com/animation/dolls5.html" vspace="0" width="100"></iframe></center><center><a href="http://netoopsblog.blogspot.com/" style="font-size: 2mm;" target="_blank">FreeWidgets</a></center></div><center><a style="font-size: 3mm" target="_blank" href="http://www.hitarek.com">Free Clock</a></center>


        Add Stylish Flash Clock5


        • If you want to add this Clock,then Copy  and paste the below code
        <div class="noop-clock">
        <center><!-- hitarek.com --><embed width="130" src="http://www.hitarek.com/clock/clock11-4.swf?TimeZone=IST&Place=&" height="130" wmode="transparent" type="application/x-shockwave-flash"></embed></center><center><a style="font-size: 3mm" target="_blank" href="http://www.hitarek.com">Free Clock</a></center></div>

        Add Stylish Flash Clock6


        • If you want to add this Clock,then Copy  and paste the below code
        <div class="noop-clock">
        <center><!-- hitarek.com --><embed width="160" src="http://www.hitarek.com/clock/clock25-9.swf?TimeZone=IST&Place=&" height="160" wmode="transparent" type="application/x-shockwave-flash"></embed></center><center><a style="font-size: 3mm" target="_blank" href="http://www.hitarek.com">Free Clock</a></center>

        </div>

        Add Stylish Flash Clock#


        • If you want to add this Clock,then Copy  and paste the below code
        <div class="noop-clock">
        <center><!-- hitarek.com --><embed width="140" src="http://www.hitarek.com/clock/clock22-5.swf?TimeZone=IST&Place=&" height="180"  type="application/x-shockwave-flash"></embed></center><center><a style="font-size: 3mm" target="_blank" href="http://www.hitarek.com">Free Clock</a></center>
        </div>

        Add Stylish Flash Clock 7


        • If you want to add this Clock,then Copy  and paste the below code
        <div class="noop-clock">
        <object><param name="movie" value="http://flash-clocks.com/free-flash-clocks-for-websites/free-flash-clock-24.swf"><embed src="http://flash-clocks.com/free-flash-clocks-for-websites/free-flash-clock-24.swf" width="150" height="150" wmode="transparent"> </embed></object>
        </div>

        Add Stylish Flash Clock 8


        • If you want to add this Clock,then Copy  and paste the below code
        <div class="noop-clock">
        <object><param name="movie" value="http://flash-clocks.com/free-flash-clocks-for-websites/free-flash-clock-15.swf"><embed src="http://flash-clocks.com/free-flash-clocks-for-websites/free-flash-clock-15.swf" width="150" height="150" wmode="transparent"> </embed></object>
        </div>

        Add Stylish Flash Clock 9


        • If you want to add this Clock,then Copy  and paste the below code
        <div class="noop-clock">
        <embed src=http://flash-clocks.com/free-flash-clocks-blog-topics/free-flash-clock-175.swf width=200 height=200 wmode=transparent type=application/x-shockwave-flash></embed>
        </div>

        Add Stylish Flash Clock 10


        • If you want to add this Clock,then Copy  and paste the below code
        <div class="noop-clock">
        <embed src=http://flash-clocks.com/free-flash-clocks-blog-topics/free-flash-clock-150.swf width=200 height=200 wmode=transparent type=application/x-shockwave-flash></embed>
        </div>

        Add Stylish Flash Clock@


        • If you want to add this Clock,then Copy  and paste the below code
        <div class="noop-clock">
        <object><param name="movie" value="http://flash-clocks.com/free-flash-clocks-for-websites/free-flash-clock-63.swf"><embed src="http://flash-clocks.com/free-flash-clocks-for-websites/free-flash-clock-63.swf" width="150" height="150" wmode="transparent"> </embed></object>
        </div>


        Add a Static Clock

        Step 2:
        • Copy and Paste the CSS code below after the code of clock.
        <style type="text/css">.noop-clock {
        position: fixed;
        right: 0%;
        top: 0%;
        padding: 3px 7px;
        box-shadow: -2px 2px 6px;

        }</style>
        •  Then click on Save.
        With this tutorial you have got a Beautiful Clock.
        If you feel any confusion or doubt then please do comment.

        Facebook Static Pop Out Like Box with jQuery Effect for Blogger

        / Saturday, February 18, 2012 /
        facebook pop out likebox
         Here is a Tutorial about how to add a static Pop out Like Box with Cool jQuery hover effect.This a Awesome Blogger Blog Widget that adds a little beauty to your blog.

        After installing this Widget a Facebook Logo will appear on the right side of your Blog.When you Mouse over that Logo it Pop out with Smooth jQuery Effect.

        Follow the instructions for installing this Widget.


        If you don't interested in Editing HTML,you can use our WIDGET GENERATOR.

        Install Facebook Pop Out Like Box Widget

        • Go to Design-> Page Elements
        • Click on Add Gadget
        page elements blogger
        • Select HTML/Javascript from it
        • Leave title as blank ,Copy and Paste the below code into the content section.

        <script type="text/javascript">
        /*<![CDATA[*/
        jQuery(document).ready(function() {jQuery(".noopslikebox").hover(function() {jQuery(this).stop().animate({right: "0"}, "medium");}, function() {jQuery(this).stop().animate({right: "-250"}, "medium");}, 500);});
        /*]]>*/
        </script>
        <style type="text/css">
        .noopslikebox{background: url("https://blogger.googleusercontent.com/img/b/R29vZ2xl/AVvXsEgXZvus5ix72p0sIXg04o5oNZs95U1bMExsaOj0w8h3LB9wsY6TYmOYljE0wBMQrWx520aRO-EunbFrY_ZnsqcxvkXBxBEoVW5dPy28D0cOZraYcMfw2nlXMnPtZGb6ttCMFkJ10_0FYck/s1600/fb_static+button.jpg") no-repeat scroll left center transparent !important;display: block;float: right;height: 270px;padding: 0 5px 0 46px;width: 245px;z-index: 999;position:fixed;right:-250px;top:20%;}
        .noopslikebox div{border:none;position:relative;display:block;}
        .noopslikebox span{bottom: 12px;font: 8px "lucida grande",tahoma,verdana,arial,sans-serif;position: absolute;right: 7px;text-align: right;z-index: 999;}
        .noopslikebox span a{color: gray;text-decoration:none;}
        .noopslikebox span a:hover{text-decoration:underline;}
        </style>
        <div class="noopslikebox">
            <div>
            <iframe src="http://www.facebook.com/plugins/likebox.php?href=http://www.facebook.com/pages/NetOops-Blog/159796530791611&amp;width=245&amp;colorscheme=light&amp;show_faces=true&amp;connections=9&amp;stream=false&amp;header=false&amp;height=270" scrolling="no" frameborder="0" scrolling="no" style="border: medium none; overflow: hidden; height: 270px; width: 245px;background:#fff;"></iframe>
            </div>
        </div>
        • Replace the RED highlighted text with your Facebook page URL.
        I hope you'd liked this Article,if so please share, like this. 

        Convert Blog Posts to PDF file in Blogger Blog

        / Friday, February 10, 2012 /
        pdf blog post
        Here is a post that helps you to easily convert the Blog posts/Blog/Website to a Pdf file.So you can easily refer that Blog Post without the connection of Internet.

        Follow the Instructions Below


        How to convert Blog post to PDF

        •  Then Click the button P on the left side
        • That's all.You will get the PDF file.

        Get PDF file of Blog post in this Blog.

        • Simply open the Blog post you want to Convert.
        • At the end of post there are some sharing buttons (Please share via Facebook,Twitter,etc) ,you will see an icon  P that like you found on the http://pdfmyurl.com,(Shown in below Fig.)  Click it
        blog post to pdf

        • You will get the PDF file of that post.
        I hope you had enjoyed this post....Please Share this

          Add Flying Letters below Mouse Pointer Animation

          / Wednesday, February 8, 2012 /
          flying letters below mouse
          How to setup flying letters below mouse pointer.This a simple article that Spice your Blog.After inserting this Code,When you move mouse over your Blog, you will see that Letters you SET in the below code will flying like a Animation.


          Install Flying Letters Below Mouse Widget

          Make sure you had Backed up your Template(How To BackUp Template?)

          • Sign In to your Blogger Account
          • Go to Design->Edit HTML
          • Find </body> (Find Easily Using Ctrl+F) and Copy and Paste the below Code
          <script type="text/javascript">
          var text=&#39; ENTER YOUR FLYING TEXT HERE &#39;;
          </script>
          <script src="http://netoopscodes.googlecode.com/svn/branches/Js%20files/mousetail.js" type="text/javascript">
          </script>
          • Save it,its all.....you are almost done.

          Find Color Code - Online Tool For Designing

          / Saturday, February 4, 2012 /
          Color code generator
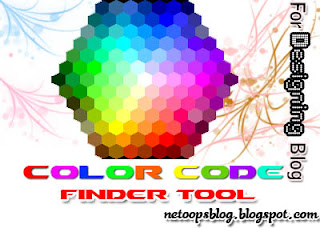
          Here is a color code Finder Tool for you to easily find the Hex,RGB code of the color you want.
          This is an important Tool that a Blogger Blog owner need.
          The Following Online Color Code Generator Help you when Design your Blog.


          Online Color Code Selector Tool 1


          Online Color Code Selector Tool 2


          If you enjoyed this Post Please Share This...

          Stylish Google friend connect Button to Increase followers

          / /
          Google Friend Connect
          Google Friend Connect is an awesome Tool that lets your visitors to Follow your Blog and Increase your Blog Rank,gets Higher Traffic.

          Here I am saying about how to add a Standalone Google Friend connect Button or Link to Your Blog/Page or anywhere in your Blog.

          This Google Friend Connect Widget can only be place at Widget.This Standalone Friend connect button can place at anywhere also in the Post.

          Follow the instructions below.

          Add Follow button with Text

          <a href="http://www.blogger.com/follow-blog.g?blogID=PLACE YOUR BLOG ID HERE" target="_blank" title="Follow With Google Friend Connect"><img border="0" src="https://blogger.googleusercontent.com/img/b/R29vZ2xl/AVvXsEh5sUrbpAKj8ea8sVERzK9XrlL6VBV5k0ka9lo8f3-kkgbAO3xBHzNf8Fxq9YpBRoafLkmeYu4rP5EPWbubL2b7FiVgyjrp0RiNngsCApva4CydTPC54XdRIl7AdRTFirg1Nv9U5Y3VbSs/s1600/google+friend+connect+netoops.jpg" /></a>
          Preview


          Add a Stylish Follow Button

          <a href="http://www.blogger.com/follow-blog.g?blogID=PLACE YOUR BLOG ID HERE" target="_blank" title="Follow With Google Friend Connect"><img border="0" src="https://blogger.googleusercontent.com/img/b/R29vZ2xl/AVvXsEi0SPGSPkYmOJuamBZYSJ0OGtx-zeyePHXvXFIy_2sibVjKskQtWi29MP-t3vt5Vhb2QbfipdAX3AmWcIBDHdC0iKaCny-qDD_qdqRZ0cRoiHPznuZVolMNVVmCSJgulgf-Y7j0ZSdLUYo/s1600/google+friend+connect+style.jpg" /></a>
          Preview

          Another Stylish Follow Button

          <a href="http://www.blogger.com/follow-blog.g?blogID=PLACE YOUR BLOG ID HERE" target="_blank" title="Follow With Google Friend Connect"><img border="0" src="https://blogger.googleusercontent.com/img/b/R29vZ2xl/AVvXsEhPh_MkpQKIOd-o2LNEMcjsPvyXgHk4TIpv8AhAlUK49IAYTJ-oltorKtbCtzcZdNhjKdI4Ar1sWIWL-_iRXroIQW5837FzvP0mHHPjv3KHaOe2w012Aki6LCmiqwl-ruksWE5erDoeqDw/s1600/google+friend+connect+style2+netoops.jpg" /></a>
          Preview

          Another Water Blue Stylish Follow Button

          <a href="http://www.blogger.com/follow-blog.g?blogID=PLACE YOUR BLOG ID HERE" target="_blank" title="Follow With Google Friend Connect"><img border="0" src="https://blogger.googleusercontent.com/img/b/R29vZ2xl/AVvXsEgJAFGPsmecV0Bn0uet7OG4smNw2EiRq62l4ZWfE2nGQ5T7CAwRdnbPAJT6sPIusYPMm79DxrJ04-CpD5-VCQ1_aGGAWlEVGPrtaA4n3jZ2FUdJkqCZlZWNtd8kEm8FyzRyh2TIQuW7_WM/s1600/google+friend+connect+style3+netoops.jpg" /></a>
          Preview


          How to Find your Blogger ID

          • Simply Go to Design or Settings or Posting or any other of the TAB
          • Watch the URL on Address Bar of the Browser and copy the Blog ID number and replace "PLACE YOUR BLOG ID HERE" with your blog id .


          How to Add Follow Button Below Every Post.


          Remember that Backup your Template Before Editing (How to Backup Template)

          <div class='post-footer-line post-footer-line-1'>
          OR
          <p class='post-footer-line post-footer-line-1'>
          • Place the following code Before it
          <b:if cond='data:pageType == &quot;item&quot;'>
          PLACE THE CODE OF FOLLOW BUTTON YOU WANT (that described above)
          <.b:if>
          Example:
          <b:if cond='data:blog.url == &quot;item&quot;'>
          <a href="http://www.blogger.com/follow-blog.g?blogID=585509540650265660" target="_blank" title="Follow With Google Friend Connect"><img border="0" src="https://blogger.googleusercontent.com/img/b/R29vZ2xl/AVvXsEgJAFGPsmecV0Bn0uet7OG4smNw2EiRq62l4ZWfE2nGQ5T7CAwRdnbPAJT6sPIusYPMm79DxrJ04-CpD5-VCQ1_aGGAWlEVGPrtaA4n3jZ2FUdJkqCZlZWNtd8kEm8FyzRyh2TIQuW7_WM/s1600/google+friend+connect+style3+netoops.jpg" /></a>
          <.b:if>
          • Save the Template..Done..
          I hope you enjoyed this Post ,If any bugs with this please Comment it....
          Thank you for visiting my site. I’m the author of home decor help, home garden decor, home design interiors, tina 4 home design, uhozz, visit yogurt lab, sitazine, is beauty tips and sunnijati website. Modestop Topmodest Free Beauty Tips Shitazine Sitahouseblog Izhealthy Shitadesign Sitahouse Topmodest Sitazine Irezine Home- decor-design Shitadesign Shitadesign-dot-com Inhomeland inhouseland ghiuldenika inebautystyle enterarteiuna radiodominiopublico biberealexandru fabiobernadosdi geeklore31 syahadah-alhafeezah peaceloveiman bigwideempty techandchefadventures kaosgunlugu fikirkulubleri duazinciri theinternationalrules morefortngintn monkeymanzach lifeatthegreenys photokid84 chelsea-settles chasingmommyhood sexyhotactresseswallpaper tophotnewstodays avvani urbantrendsussex voychic reisyamode sitazine reportmy homedesignideasx mystylepinterest fashionstyleco popularnewstips isexy-hot-girls sexywomengirl trendymodeku derumahdesign womenhairs hackoblogger gadiswomen homeinteriordesignideas1s homedesignideasa uniquehomedesignsw enterpreneurforbloggers earningblogtipss lilyandgiasmom onfeatureblog aboutadsen onblogsocial tecnologiku onlinekutip akuhub caramakemoney youseoneed blogukus newbieblogit adsenseguideto triond-adsense inseoservice intipseoblog otherseoblog freeseoguid seoblognets tawaguideblog seosecretip buzdesign modewomen gayawoman cantikide tipsehat bebeautyps tipsjilbabcantiks idekontenislami healthfitnessnutritionsz jilbab-tips tips-home-decor caramemakaijilbabv beritaremajaterkinie allisoncrewnews mypinspinterest mypinspinterest gogirlsgallery seyhotgirls topmodest worldotgirls seksigirlsblog yourgirlsnet sexywomensia decorativehousedesigns simplebloggertipsz aboutadsense09s marketingner freeseotipstricksz womensiana chicstylegallery oblogkudewe colhomegallery marketserve onlibusiness artodesign designinguide oninteriorhome interiormu intutorblog blogoffeed newbloggerhint enginseo dibisnistips internetmublog onroomdesign homegardenco
           
          Copyright © 2010 SEO Tips & Tricks, All rights reserved
          Design by DZignine. Powered by Blogger